
*Disclosure – #AD -gifted. We received this product for the purpose of this post. However, all thoughts and opinions are my own.
Recently we were asked by Photowall to review one of their lovely canvas’s. If you pop by regularly then you may remember the other canvas we had printed there. I chose a photo that I took of our boys for our previous one and I was over the moon with how it turned out.
Photowall has a whole range of products to brighten up your interiors. They do murals just like this magic bookcase mural that was in my son’s room. They also do framed pictures and canvases, what’s more, you can choose from their art or upload your own. You can even have your photo turned into wallpaper!
I think a personalised canvas is more special as it holds memories of a certain time or place. One of my favourite photographs that I have taken is this one on a family walk up the canal, so I used this for my design.

Ordering your print
Ordering from Photowall is super easy. You just choose whether you want to upload your own picture or use one of Photowall’s thousands of stock images. You then select the type of print you would like and the sizes. There are options for your frame choice and then the price is calculated for you. You can pay with card or PayPal and we received our print just two days later! The print arrives in a robust cardboard box and tracking is given so you can arrange your delivery to suit.

Assembling The Canvas
It may look a little daunting when you first open the box but believe me the canvas is really easy to put together. You have four mitred lengths of wood to make the frame and of course the canvas.
First, we opened up our canvas on the table, giving us a stable base to work on.
Each length of the frame has doubled sided sticky tape, to adhere it to the back of the canvas.
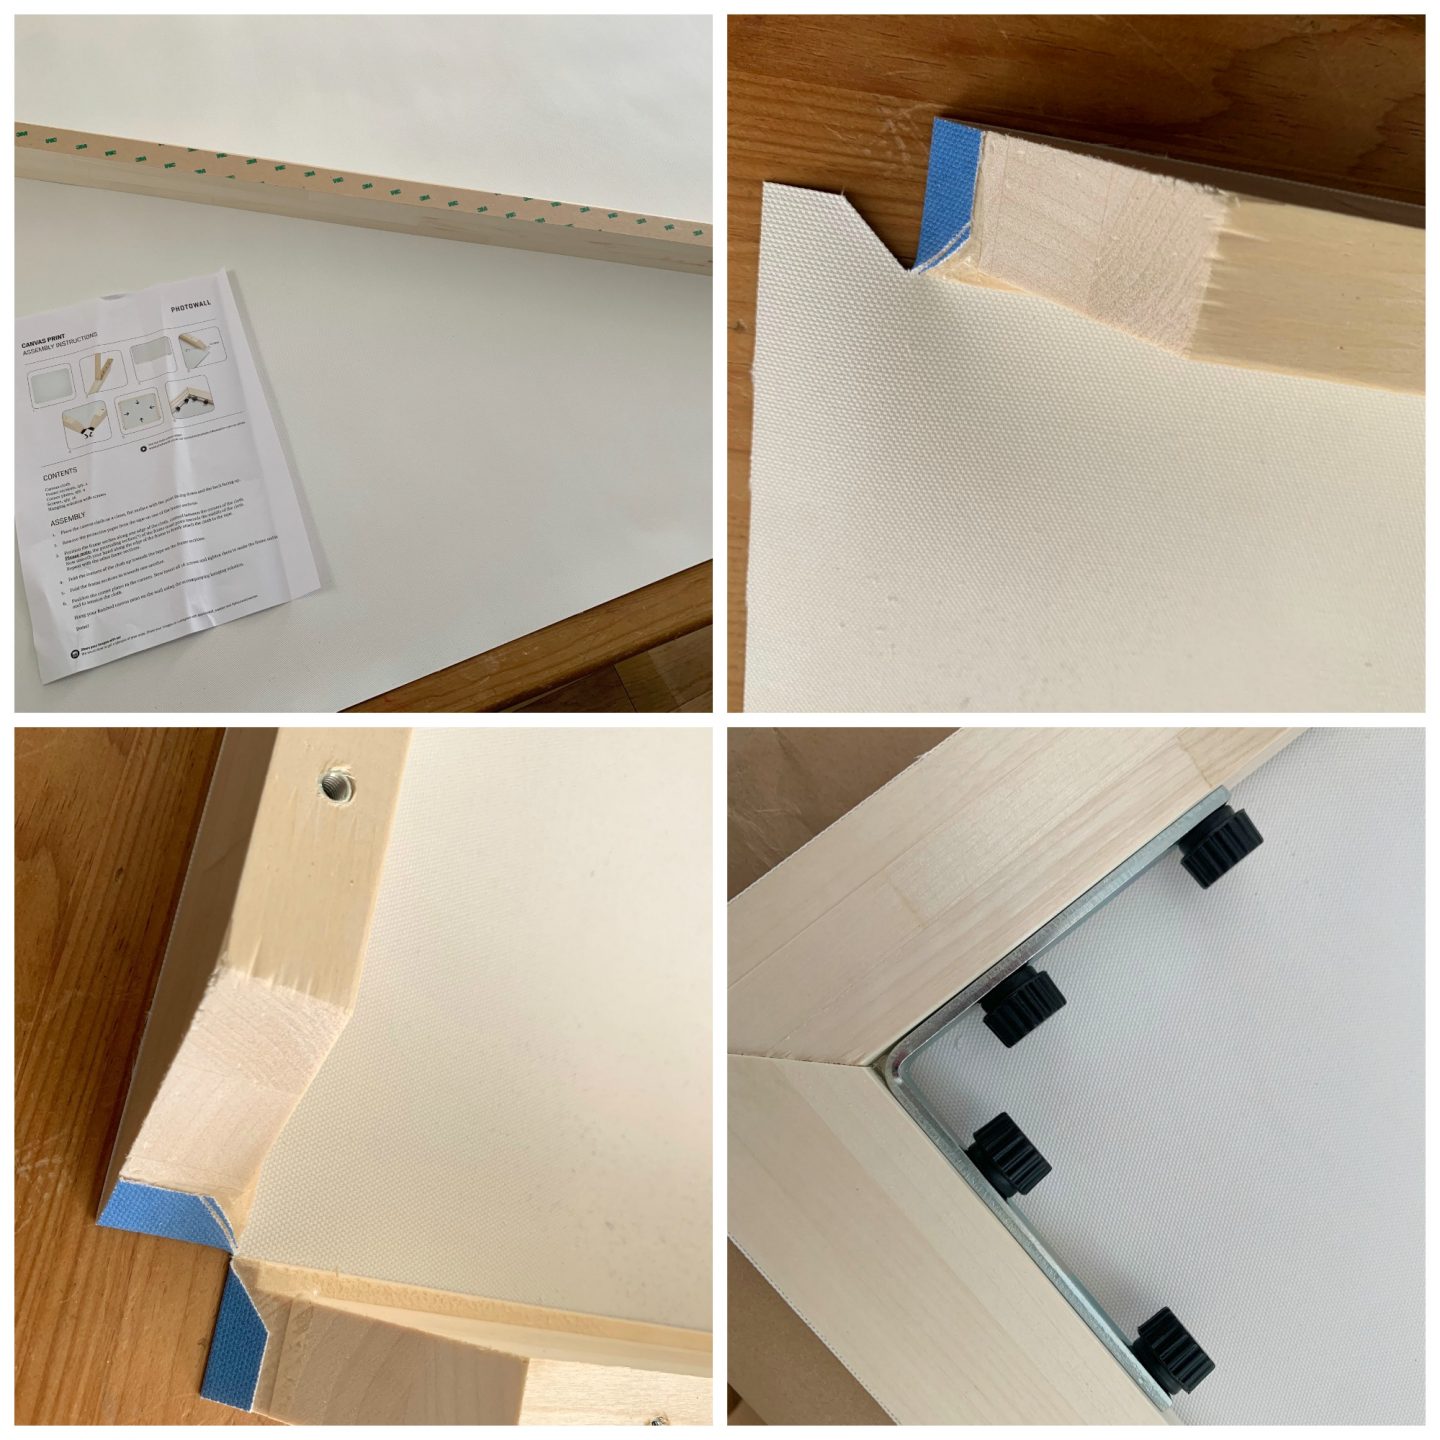
You simply remove the backing and place the stretching frame onto the edge of the canvas. When you have all of these in place and stuck down, you just roll them towards the centre of the canvas and they stretch the canvas perfectly. All you need to do then is secure the assembled frame with the corner brackets and thumbscrews. Everything is pre-drilled so fitting these is straight forward, you don’t even need any tools!
We then popped the supplied wall fixing in place and it was ready to be hung on our wall above the fireplace. It’s that easy!
I think our new canvas really brightens up our dining/office room.
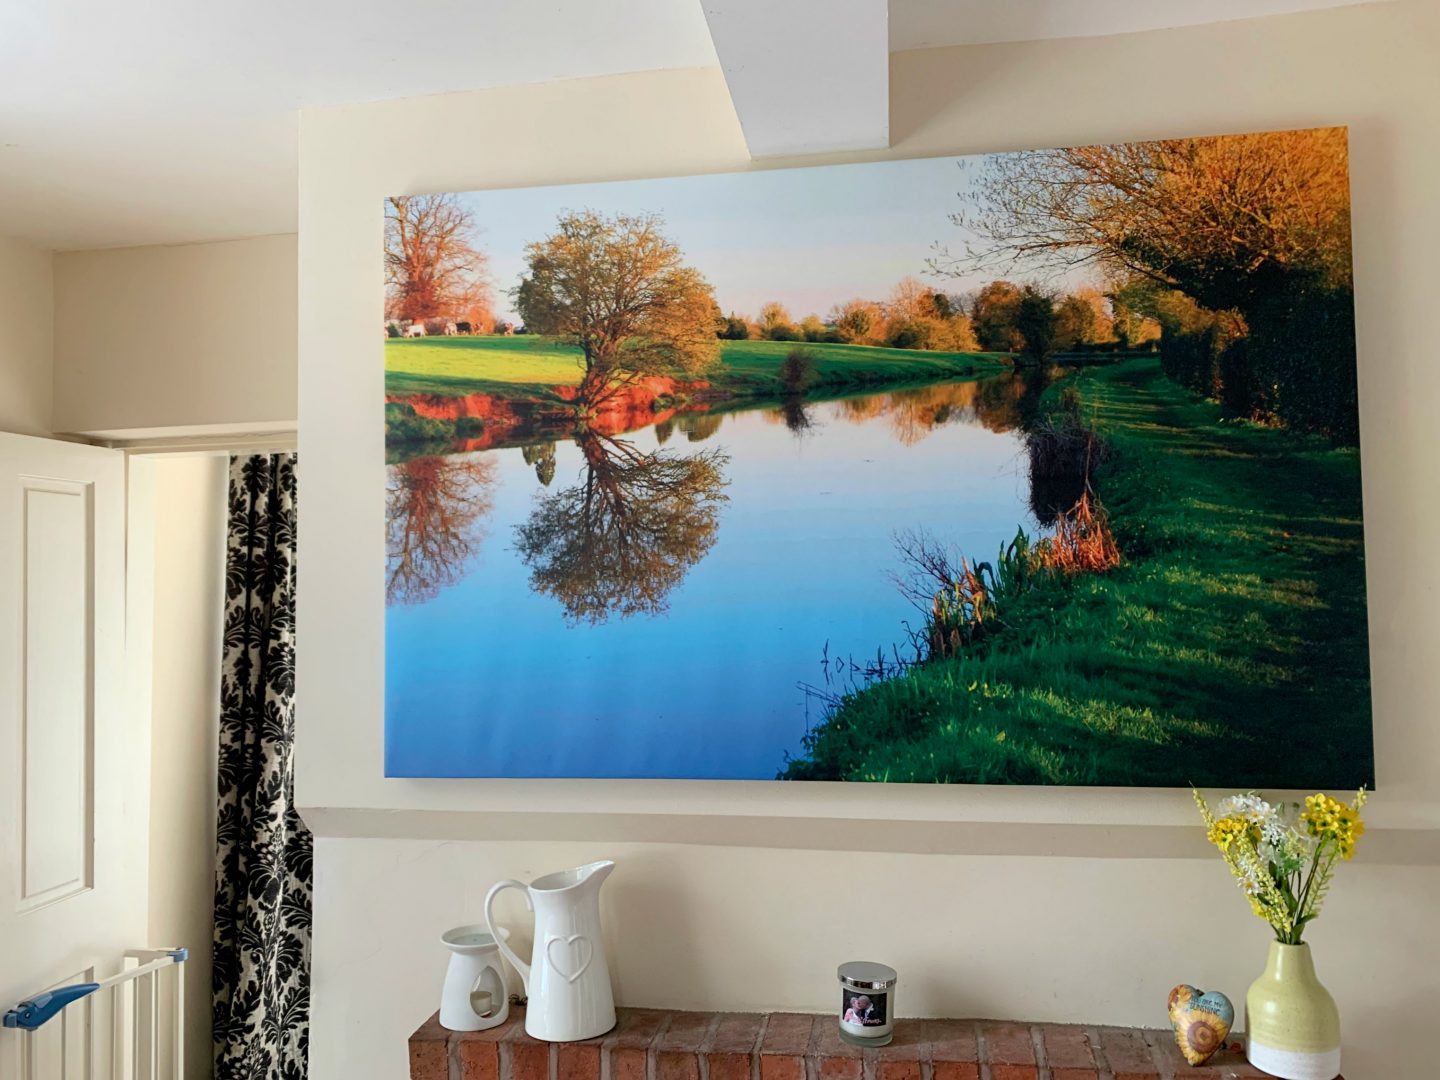 As always I’m so happy with the finish of the canvas. The image is vibrant clear and colourful just like the original photograph.
Do you have a favourite photograph that you would like to see on canvas?


That is such a beautiful image – art does so much for a room and this print is really bright and beautiful. #MMBC
This is lovely! #MMBC
What a great canvas! I love the photo you chose. Putting it together does look daunting but it sounds simple enough to put together. x
You chose a lovely photo. We’ve got one from them and I was so impressed with the quality, and you’re right about how easy it is to put together. #mmbc
I love your photo. I have some photos I’d like to do this with.
Great idea for a beauty Christmas gift
I may struggle with assembling but would be worth it